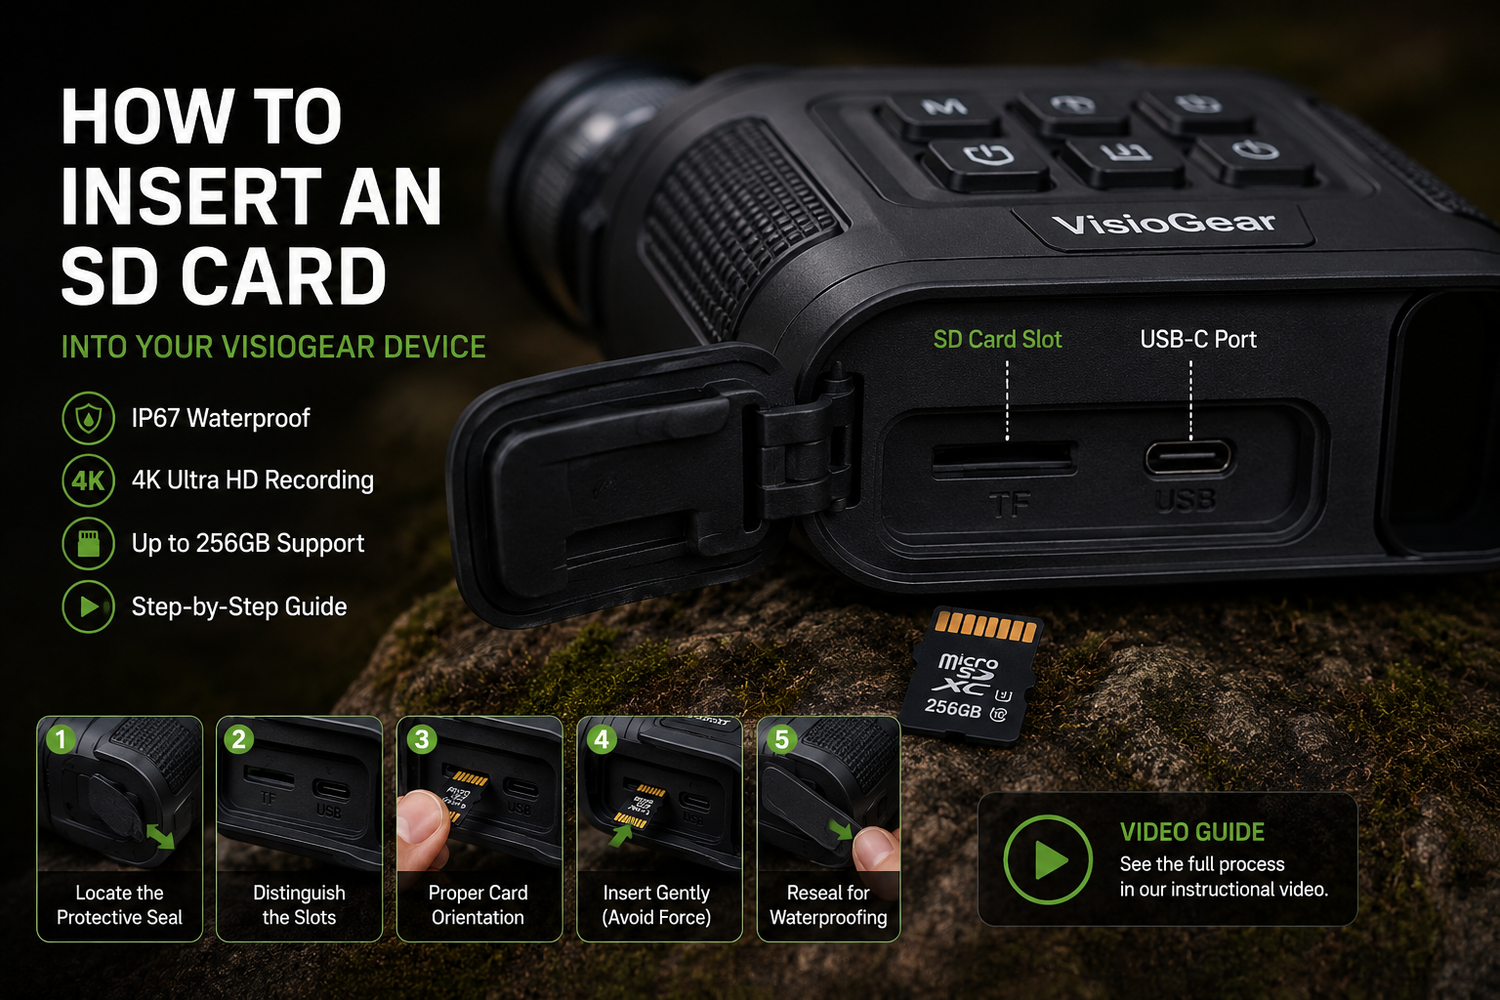
To capture and store your high-definition 4K footage, a properly installed SD card is essential. Follow this technical guide to ensure your storage is set up correctly without damaging the device's internal components.
Step 1: Locate the Protective Seal
On the left side of your night vision device, you will find a durable rubberized plastic seal. This component is critical for maintaining the device’s IP67 weatherproof rating. Gently peel back this strip from the edge to reveal the internal interface.
Step 2: Distinguish the Slots via Markings
Once the seal is open, you will see two primary interfaces. To ensure you are using the correct one, look closely at the engraved markings below each slot:
-
SD Card Slot: This is the thinner longitudinal opening, identified by a "T" or "TF" mark underneath it.
-
USB-C Port: This is the charging and data transfer interface, identified by a "USB" mark underneath it.
Step 3: Proper Card Orientation (Critical)
The orientation of the card is the most important part of this process. To ensure the pins align correctly:
-
Hold the SD card with the metal contacts facing upward.
-
Align the card with the SD slot and slide it in gently.
Step 4: Avoid Excessive Force
The card should slide into the slot with minimal resistance until you feel a light "click" from the spring mechanism.
Important Warning: Never force the card into the slot. If the orientation is incorrect, applying excessive force can cause the SD card to become permanently stuck inside the housing or damage the internal reader. If you feel significant resistance, stop immediately, remove the card, and verify the orientation again.
Step 5: Reseal for Waterproofing
After the card is securely locked in, firmly press the rubber seal back into its original position. Ensure the edges are flush with the device body to maintain full protection against moisture and dust during outdoor use.
Visual Reference: For a detailed step-by-step demonstration, please refer to our instructional video below to see the process in action.

0 comments